

The world is crazy right now. Why not take a break from the madness and practice some mindfulness making starflakes? Starflake is the Grabbits’ word for Froebel Star. Froebel stars are named for Friedrich Froebel, the innovative 19th-century German educator who came up with the idea for kindergarten. An architect by training, Froebel invented a series of toys that taught young children key skills by playing with shapes. While his star may appear complicated, it’s simple if you break it down into parts and make it in steps. Watch the video above and read on below to learn how!
Starflakes in 10 Easy Steps:
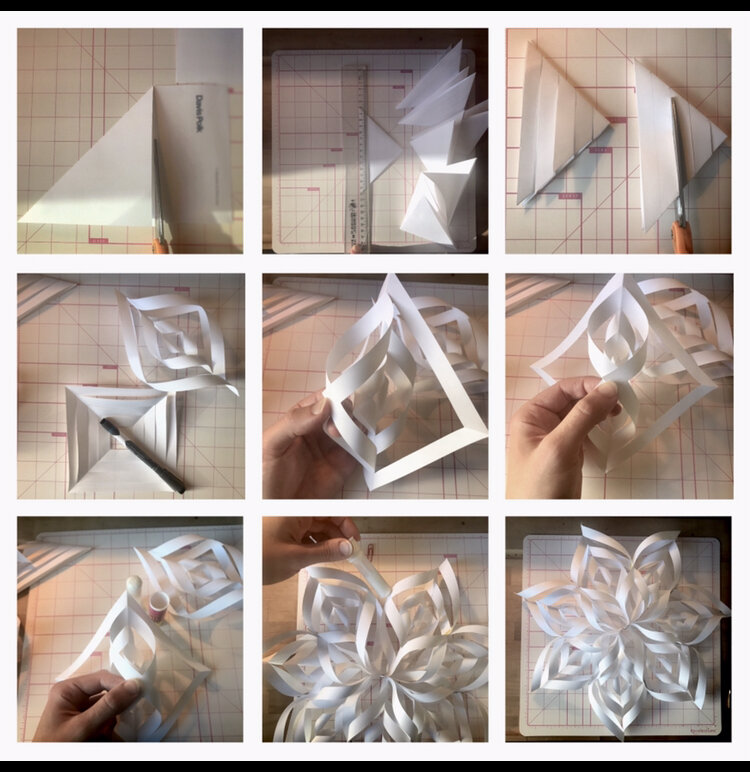
Grab some paper, scissors, glue, thread, and a paper clip. This is a great project to use up unwanted notepads. You’ll need 7 sheets of paper, one sheet to make each of the 7 segments that form the star. I used an old 5 x 8 notepad.
You can turn a rectangular sheet of paper into a square by folding one corner up to meet the long edge. Cut off the unwanted end.
Fold the triangle again, corner to corner, to make a smaller triangle. My small triangle measured 3.5 in.
Divide the length of the triangle by 5. It doesn’t have to be exact. You can fudge it. Just try to fudge all 7 pieces the same. I switched to centimeters to make it easier.
Mark off the five segments by making 4 dots on each of the folded sides of the triangle. (Starting with a 5 x 8.5 inch notepad, I ended up drawing four lines that were approximately 2 cm apart. Don’t have a metric ruler? No worries. If your starting square was 5 inches, put your marks just a tad in from 3/4 inch. Exact? No, but I lined up the ruler the same way on each piece, so it looks even in the end.)
Starting on the open side, cut on the lines towards the opposite side with the closed fold. Don’t cut all the way across. STOP cutting just before you reach the fold.
Open the folded triangle back up to the square.
Curl the cut squares in and glue the corners. Alternate the direction of the curls. This makes one segment. Repeat the steps above to make 7 segments total.
Glue the sides and points of each segment to its neighbor. Pinch and hold each one as you go to help it stick.
Slip a paper clip onto the joint between one of the pairs of segments. Cut a length of thread, slip it through the paper clip, and hang.
Can’t wait to see what you make! If you love how yours turn out, post a pic on Instagram and tag @thegrabbits.
